
For those of you who are not familiar with Yotaphone 2, it is an Andriod phone with two screens (one is LCD and one is e-ink) developed by Russia engineers. I’m always a fan of e-ink products. Nowadays we just watched too much LCD screens.
Yotaphone 2 was about several hundreds dollars when it came out, however it is now much cheaper, about 1xx dollars (probably because its failed marketing strategy). In Taobao (Chinese online store), you can get a new one for less than 800RMB. So it’s quite a deal.
Yotaphone 2 came with Andriod 4.4.3. The thing is only Russia updates the OS very often, other editions (CN, EU, HK, etc) is much slower, so it would be interesting to upgrade your Yotaphone 2 to android 5.0 Russia edition (even if you have a CN device). I will provide two methods below and explain several issues coming with them.
Method 1: Upgrade as a whole. Yotaphone provided an official way to download their files and flashers.
Steps:
1) Download yotaphone2_flasher.exe in YotaPhoneFlasher directory at ftp://fw.ydevices.com/YotaPhone2/
2) Right click yotaphone2_flasher.exe and “run as an administrator”.
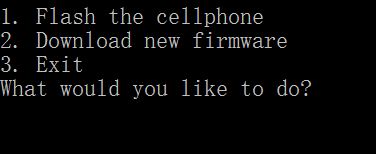
3) enter “2” for download new firmware, and you will see available packages. I chose “5.0.0-RU1.1.124.zip”. Then it will start downloading.
4) when the download is finished, enter “1. flash the phone”. The it is waiting for the device.
5) Make sure your the battery is not low. When the phone is powered off, press both “volume down” and “power” button until the phone vibrates, and it shows “downloading”. (The words in the picture below is blurry because of the camera, but it actually reads “downloading”)

6) connect your phone to your PC at this time, and it will start upgrading. At one point, it will ask if you want to erase all previous data stored on your phone, you can choose y/n based on your preference. And wait for a while, your upgrade is finished and you phone will be restarted. Notice that it will take pretty long time to start the phone for this first time because it’s configuring settings. Wait for about 10 mins, and you will enter the system.

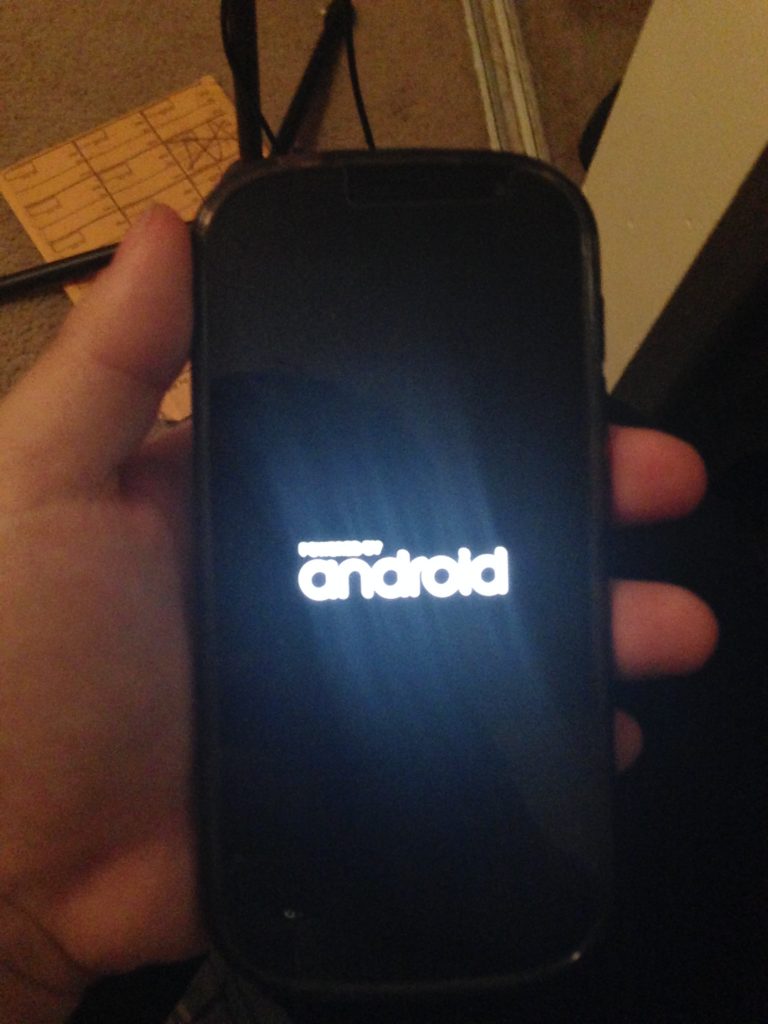
7) If you wait for more than 30min and the screen stayed at “Powered by Andriod” page, basically your upgrade failed. Please read the second method to solve this problem.
Method 2: Updating using Fastboot
If you have the problem described in step 7) in Method 1, mostly it’s because some packages were not delivered to your phone. To solve this, we will use Fastboot to flash the packages one by one.
steps:
1) Find the folders where you put your “youtaphone_flasher.exe”, and open it. It should look like the following picture:
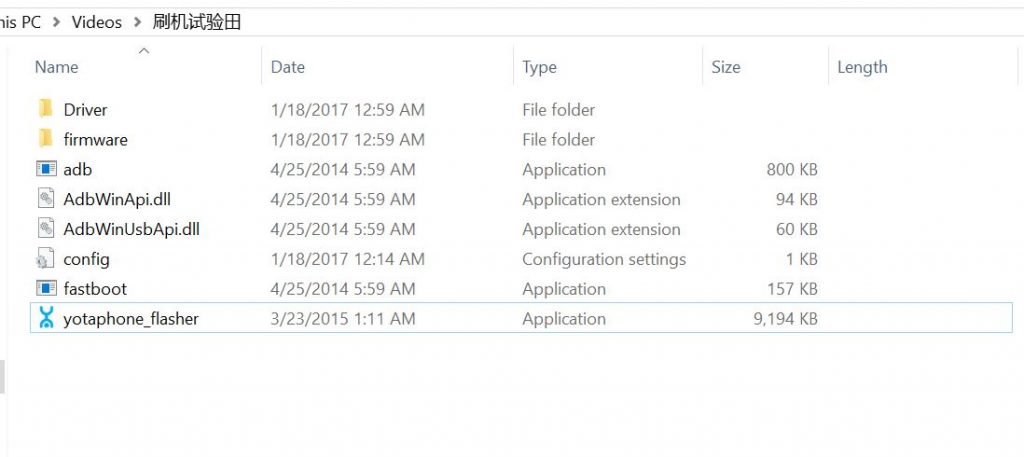
My directory is “C:\Users\yd975\Videos\刷机试验田”, sorry for the Chinese characters here, but it’s just a name of the folder, you can change it to whatever you like.
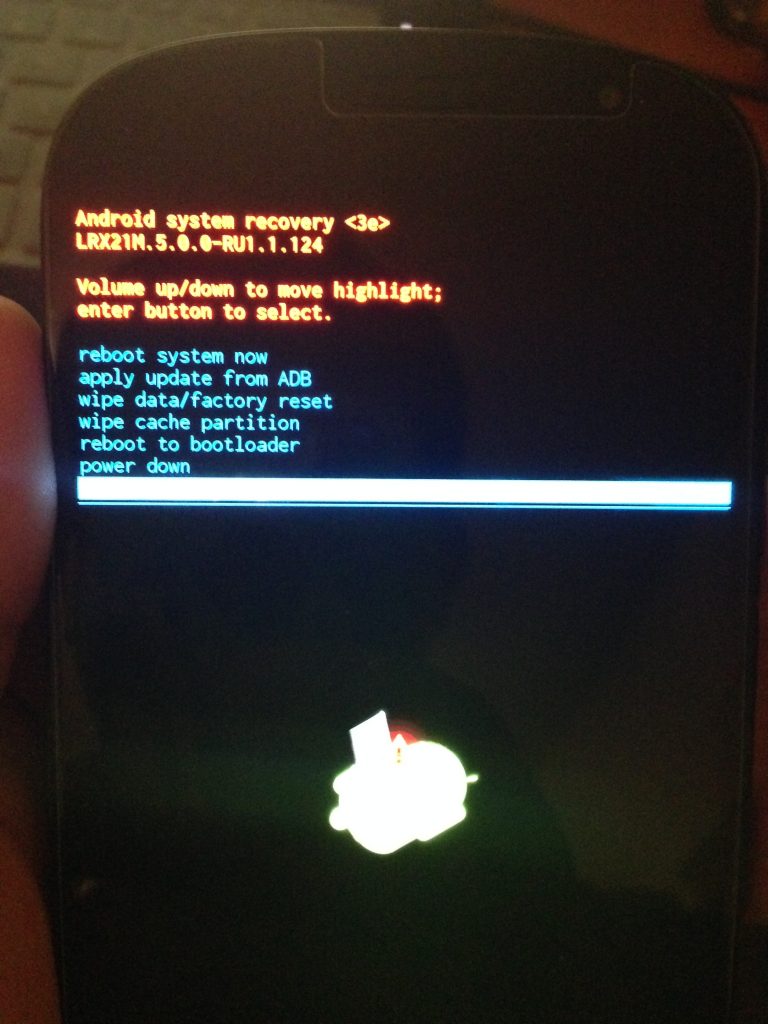
2)Right now your phone stayed at “Powered by Andriod”. Push “Volume UP” button and “Power” button for 10-20s, until the phone vibrates. Then it will enter “Andriod system recovery”. like the picture below. use volume up and down button to select “reboot to bootloader”, use “Power” button to confirm, and you will enter the “downloading” page like Method 1 Step 5.
3) Connect your phone to your PC. In your folder where you put “youtaphone_flasher.exe”, on empty place, hold shift and right click, select “open command window here”.
4) Input the following command lines into cmd, make sure each command returns a result of “OKAY”.
“Your directory” fastboot.exe flash aboot firmeare/emmc_appsboot.mbn
(for example: I put C:\Users\yd975\Videos\刷机试验田>fastboot.exe flash aboot firmware/emmc_appsboot.mbn Because my directory where I put my “Yotaphone_flasher.exe” is C:\Users\yd975\Videos\刷机试验田)
“Your directory” fastboot.exe flash boot firmware/boot.img
“Your directory” fastboot.exe flash system firmware/system.img(Usually people will fail at this step, it is because system.img is too big a file for Fastboot to open. Use ‘”Your directory” fastboot.exe flash -S 500M system firmware/system.img’. what this command does is split the system.img file into several small ones (each one is near 500M), and read them one by one. If 500M file is still too big for your Fastboot, you can set it to 300M, 200M,100M, etc. If that still not works, usually it means your Fastboot is crazily out of date. You can find and download a new version of Fastboot on the Internet and try the previous steps again. )
“Your directory” fastboot.exe flash recovery firmware/recovery.img
“Your directory” fastboot.exe flash cache firmware/cache.img
“Your directory” fastboot.exe flash modem firmware/radio/NON-HLOS.bin
“Your directory” fastboot.exe flash sbl1 firmeare/radio/sbl1.mbn
“Your directory” fastboot.exe flash rpm firmware/radio/rpm.mbn
“Your directory” fastboot.exe flash aboot firmware/emmc_appsboot.mbn
“Your directory” fastboot.exe flash userdata firmware/userdata.img (sometimes this step fails, but it will not affect the upgrade, so don’t worry about it.)
fastboot.exe reboot
After you enter the last command line, which is to restart the phone, you phone will stay at the flashing logging in window for about 10min (Method1 step 6’s picture). Be a little patient and you will enter the new system.
Conclusion:
My main reference is from “felonwang”‘s blog. http://blog.sina.com.cn/s/blog_59cf67260102w33g.html
He discussed the general steps and several interesting points. I feel honored to learn from his article. I respect and appreciate all his effort and work. While, my unique contribution for my article is:
- I put up the details of how to fix the upgrading failure (“stayed on Powered by Andriod page forever”).
- I put more details on how to use Fastboot to deliver each package to the phone one by one.
- I researched and solved the problem of opening system.img
It takes time to do research on internet and play around with my phone. But I got much happiness when it finally works. Good learning experience for me, and I hope this article can help people who are interested in this aspect and have similar problems.
Yingzhang Dong
Austin, TX
2017
This article is originally written by Yingzhang Dong, and please note source if you would like to quote.
Thanks a lot, you are my hero!
Saved a bricked device, almost gave it up.
You rock!
haha, no problem man. 🙂
Thank you for your post it is easy to understand and very helpful. Flasher and other links are expired. If u have files please upload and send me links. It ll be a lot to me. Thank you sir.