Dell inspiron 15 was my first laptop in my life, it was about 5 years old now. At one time, i encountered the classical dell problem “7 beeps”. Basically when you turn on the laptop, the screen is not going to be on, and the machine beeps seven times. From Dell’s specification, this problem is related to the motherboard, more specifically, it’s related to the GPU and Northbridge. I was looking on the website and there are so many ways to solve this, and some crazy method includes putting the motherboard in the oven. And it actually works for a while, because in my point of view the problem is due to the heat dissipation of the GPU and Northbridge. I looked for some tech shops to help me with this, i was cheated in the ZhongGuanCun tech shop. They basically just put some silicon pat on the GPU and other components to improve the temperature dissipation problem, and they told me they changed the northbridge. I was not able to find their trick because i don’t understand this. Now after doing researches I know I’ve cheated. For anyone who is going to the ZhongGuanCun in Beijing to repair your computer or buy a new, don’t go there! Most of them are very bad sellers.
Okay, back to the topic, I found another way to improve the heat dissipation of my laptop, and it proves to be working, and i will share with you guys now.
Notice: it is your own risk to do following steps. Only implement it if you feel confident enough.
first step is to dissemble your dell M5010. There are tons of videos on youtube, and you can find it’s pretty easy to take out all the shells.
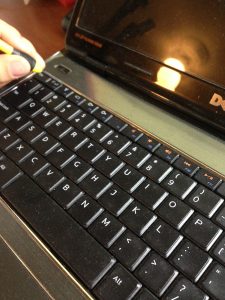
there are four small “teeth” on the top side of the keyboard (beneath it), and you can use a small flat screw drive to push back the teeth. And after pushing back all four teeth, you can flip over the keyboard.
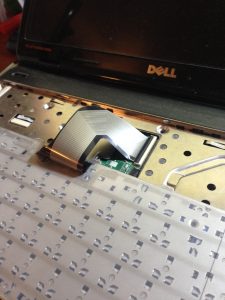
Be careful because there is still connection on the back of the key board. For the stripe connector, bent over the connector, and this move can free the ribbon cable, and now you can take out the keyboard completely. 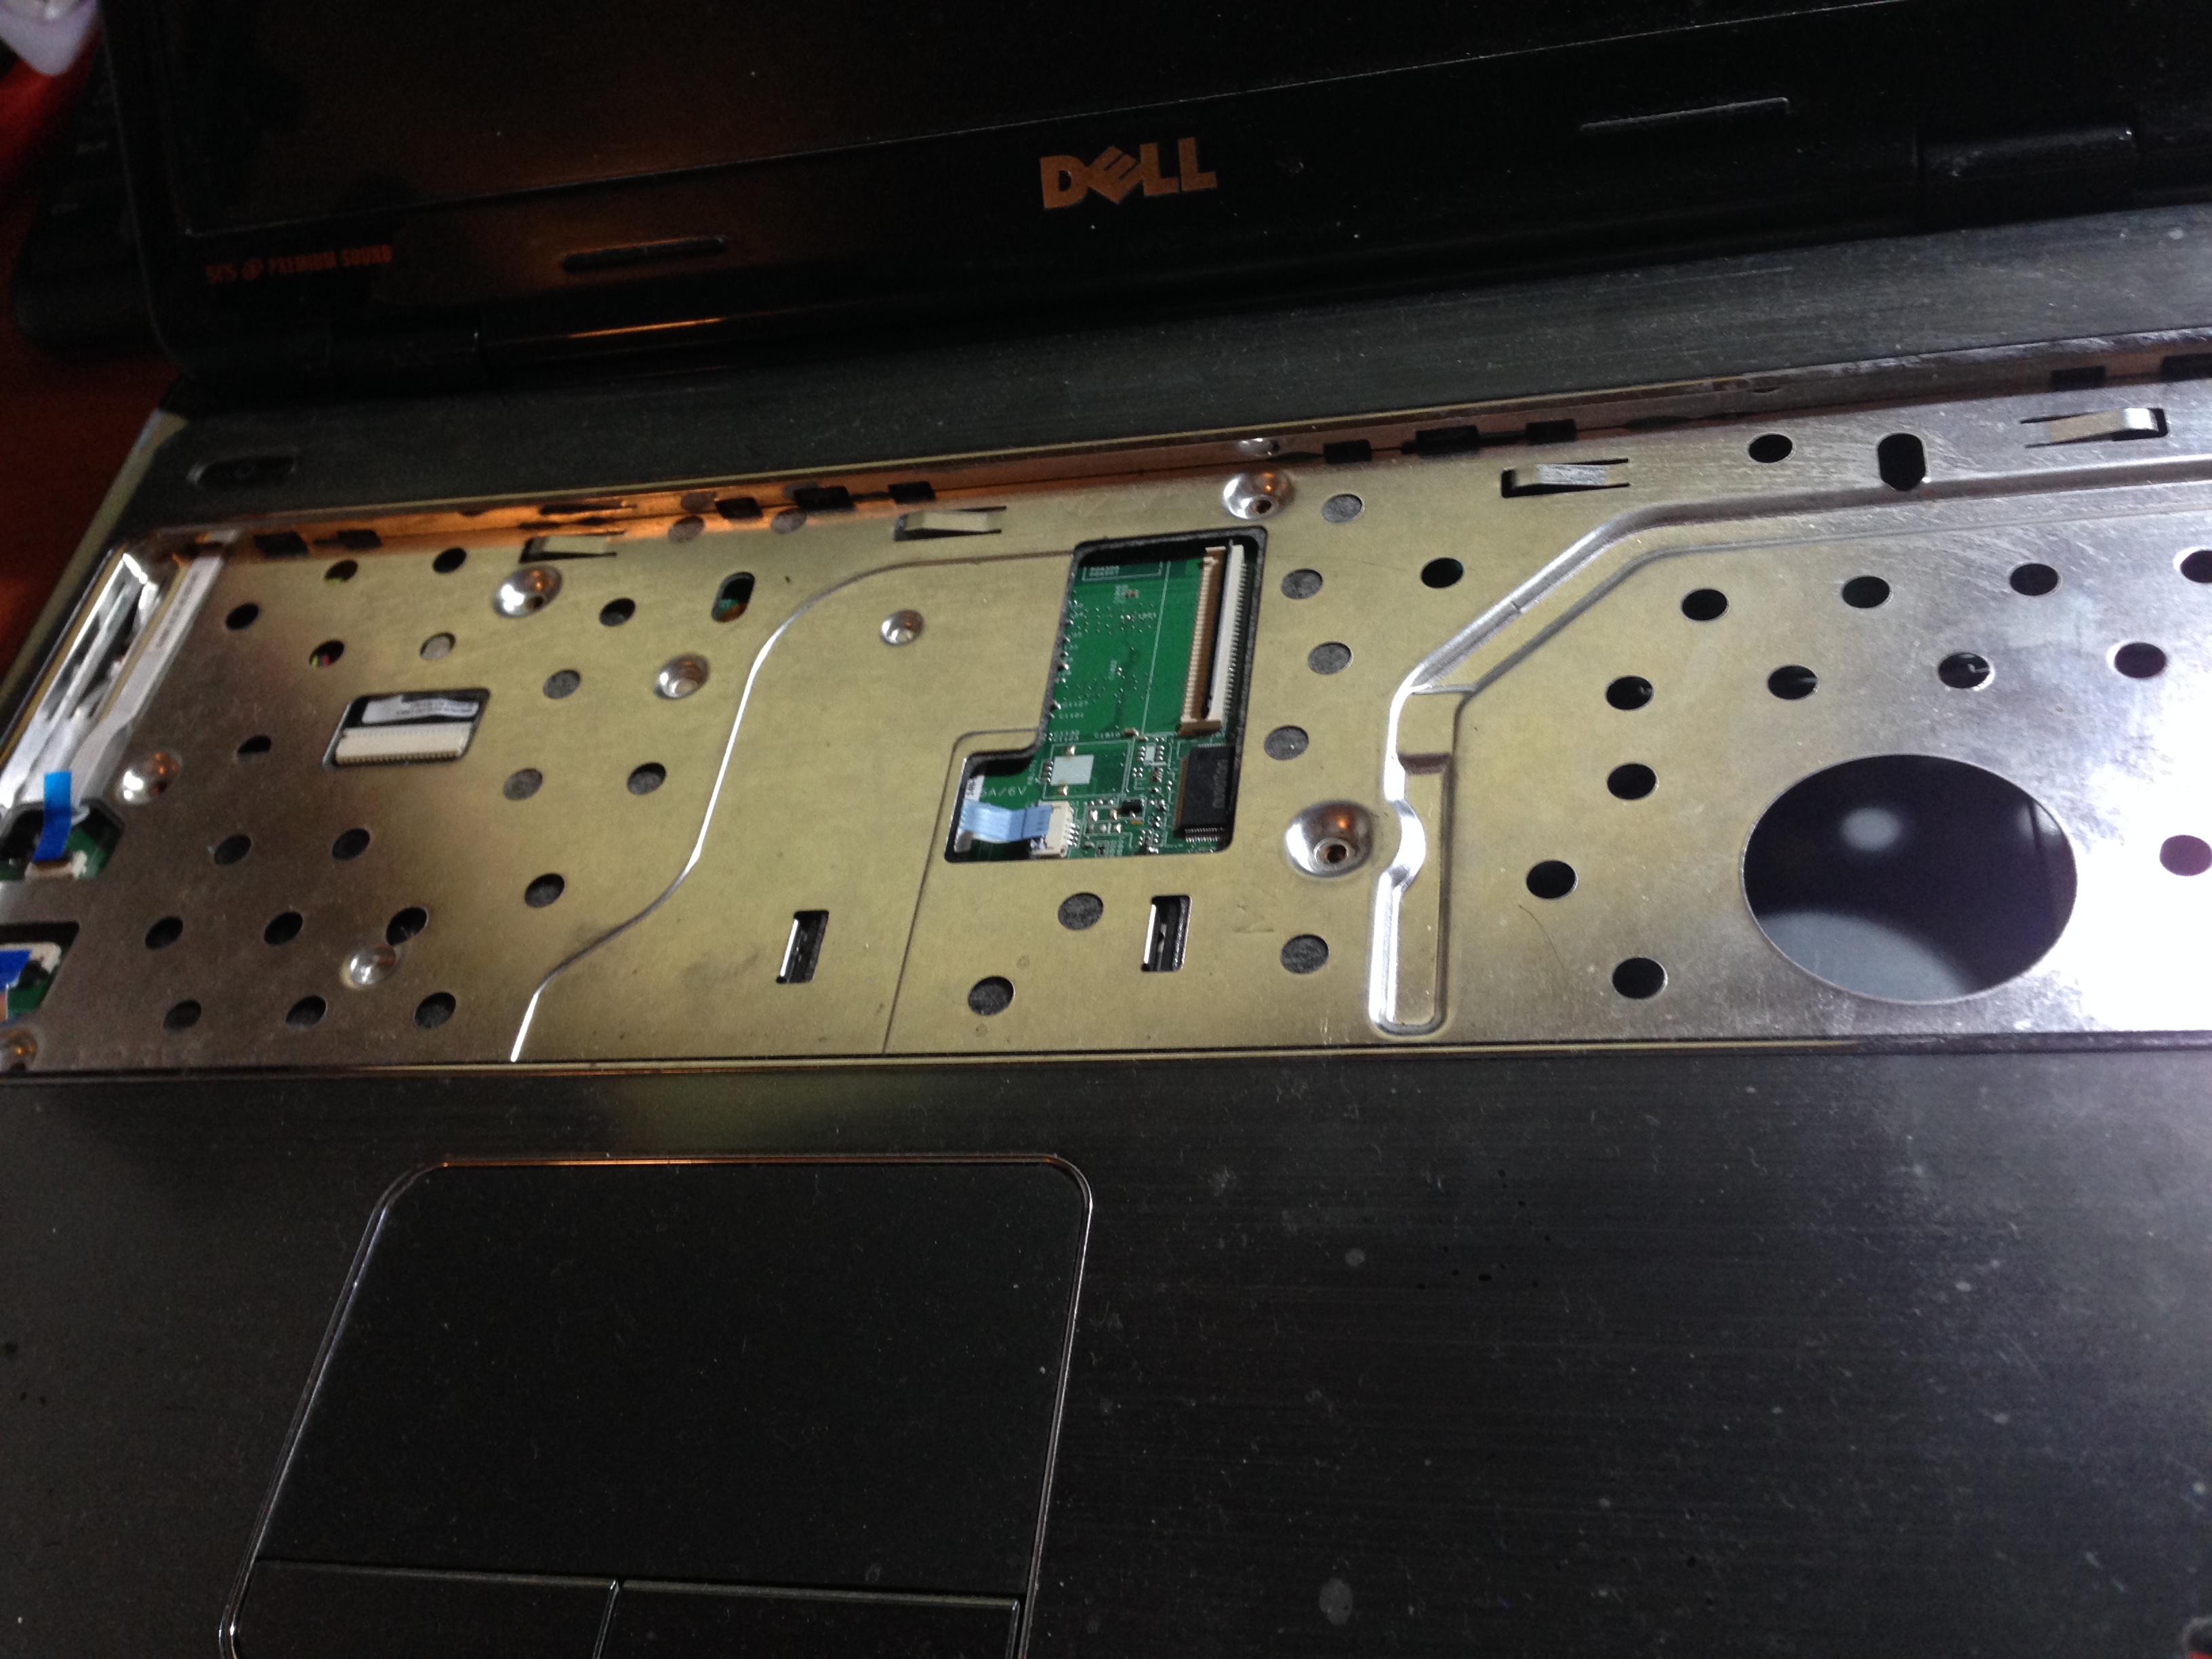
This is a picture showing the laptop without the keyboard(I also took out the DVD drive as you can see, you don’t have to do this, but it might be helpful to dissipate more heat without the DVD drive). There are five screws on the shiny plate, and you can take all of them with a screw driver.
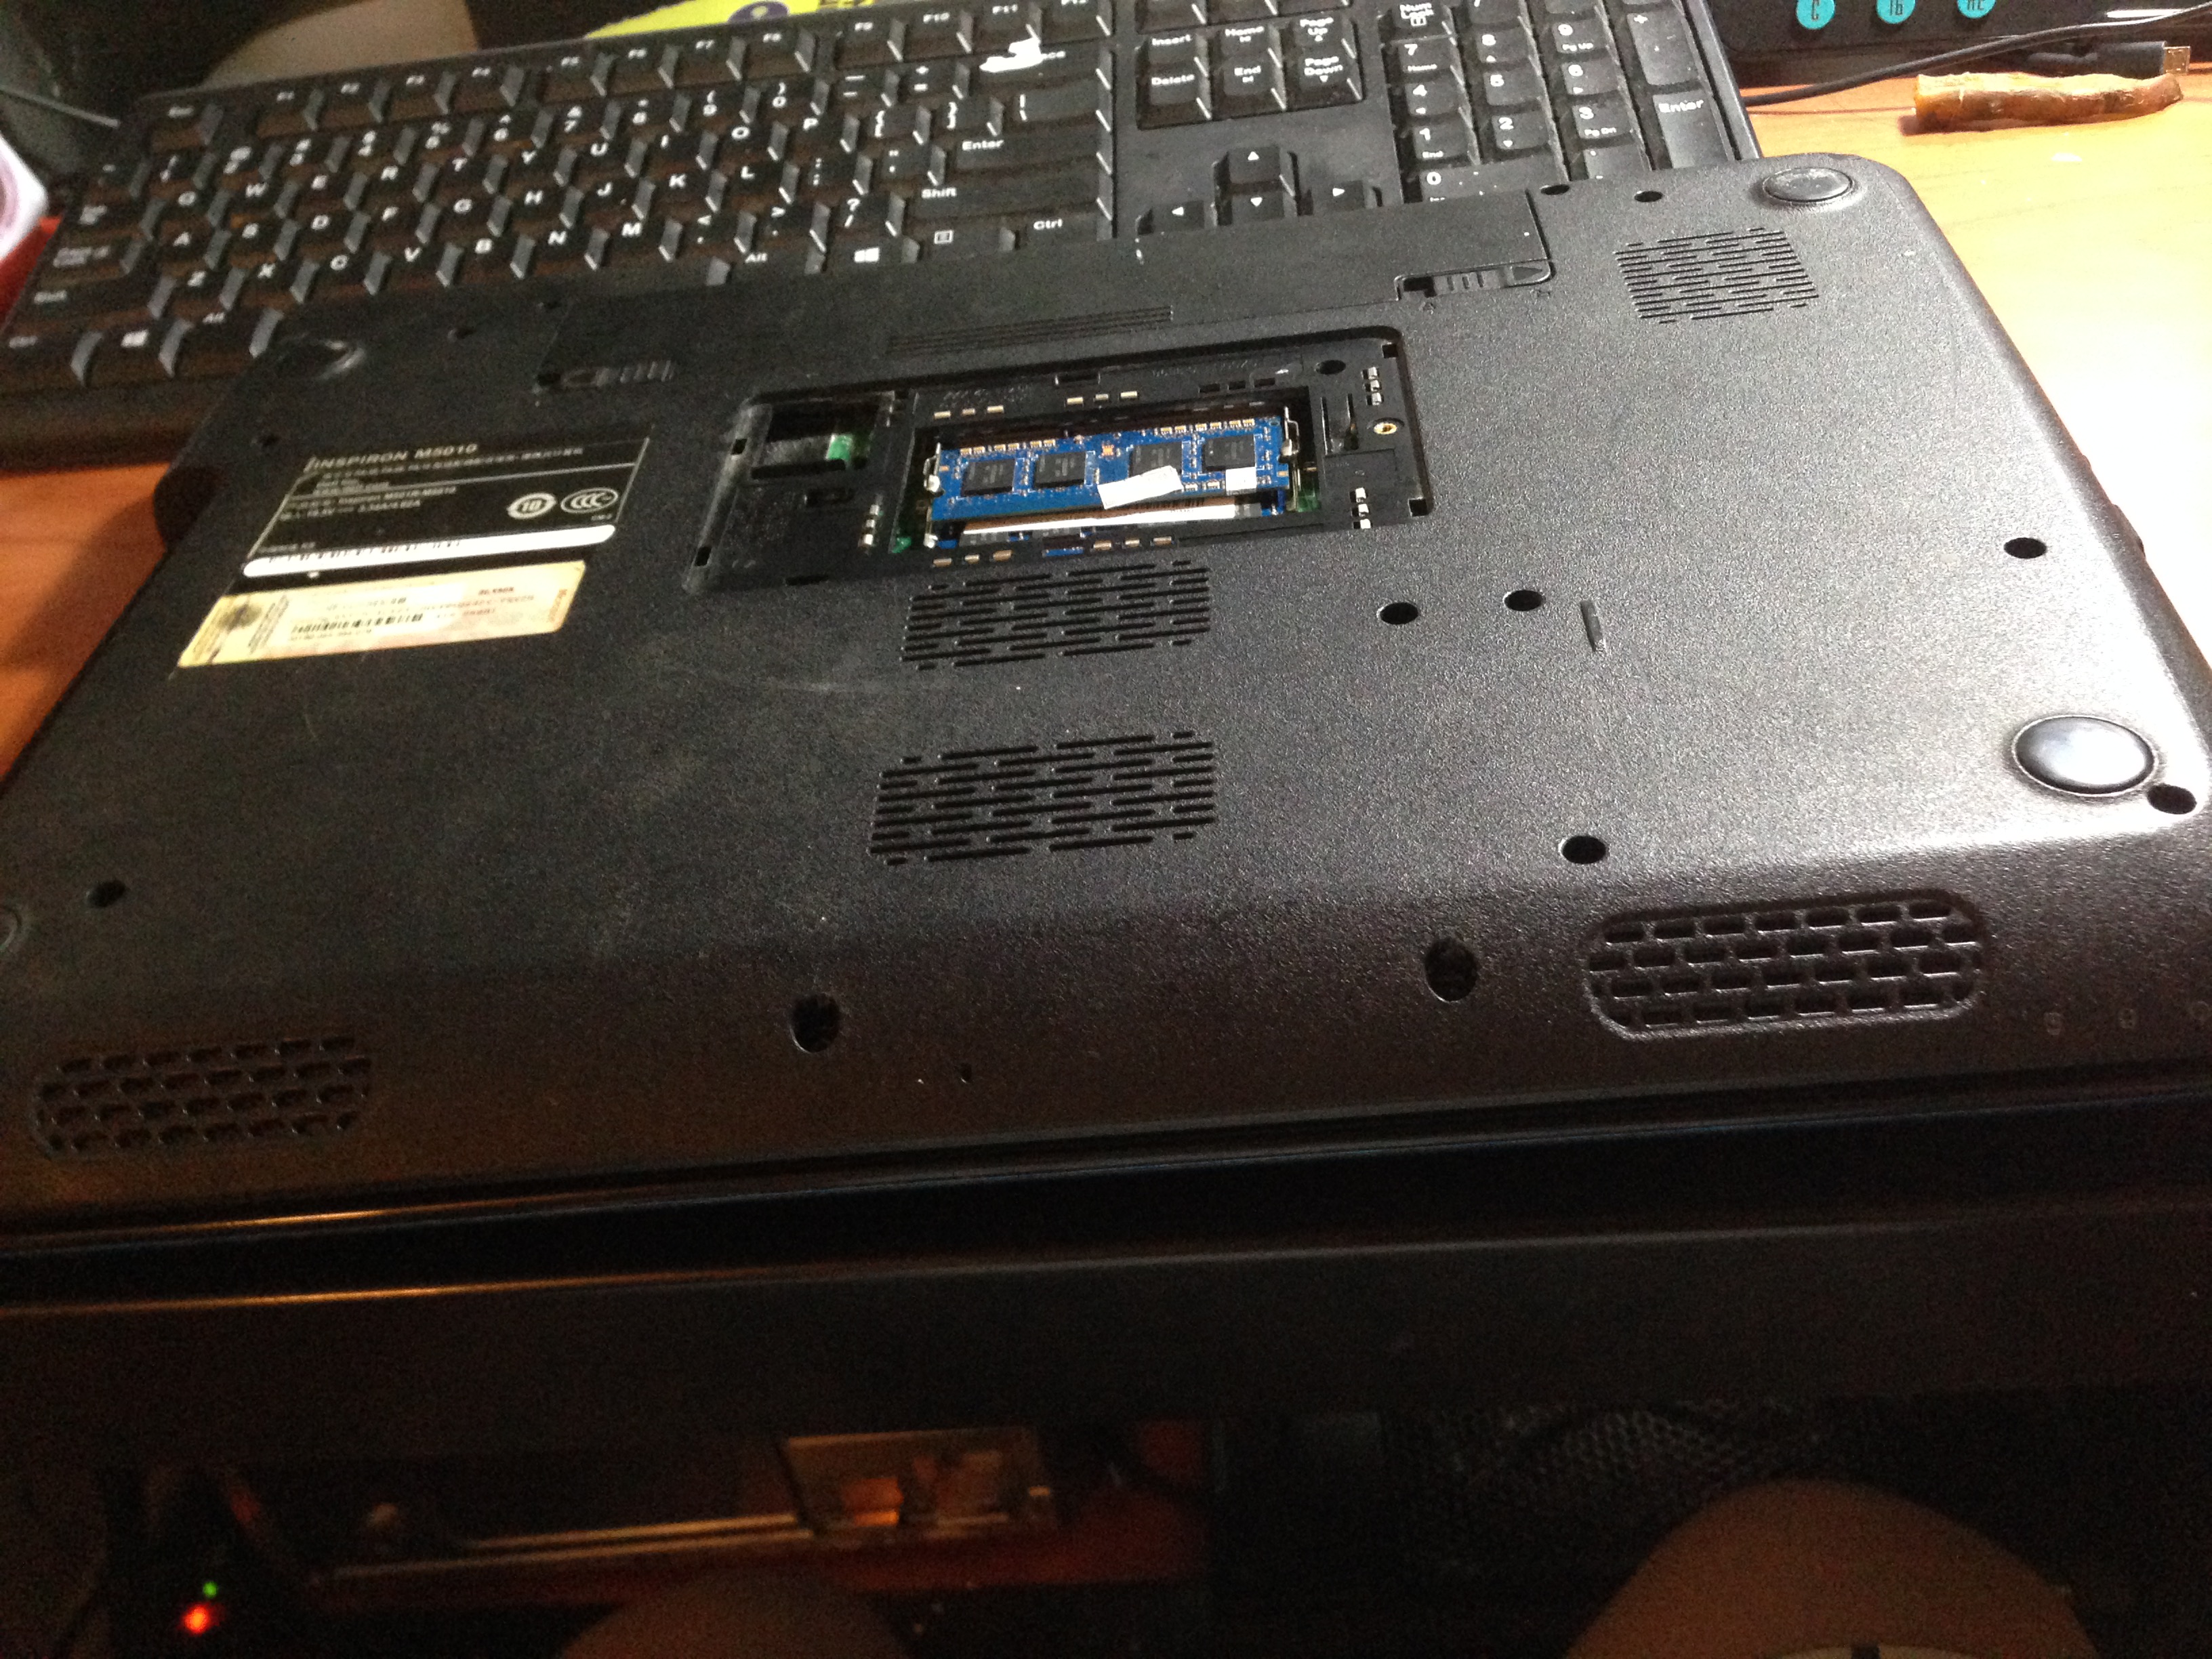
Next, flip back. Take out lid for memory. And take out all the screws on the back. Notice that there are four hidden screws on the bottom near the speaker, and you need to take out a rubber pad to reveal the actual screw. And also, the four square-shape screws on the lower right corner are screws for the harddisk. Gently remove them without unnecessary force.
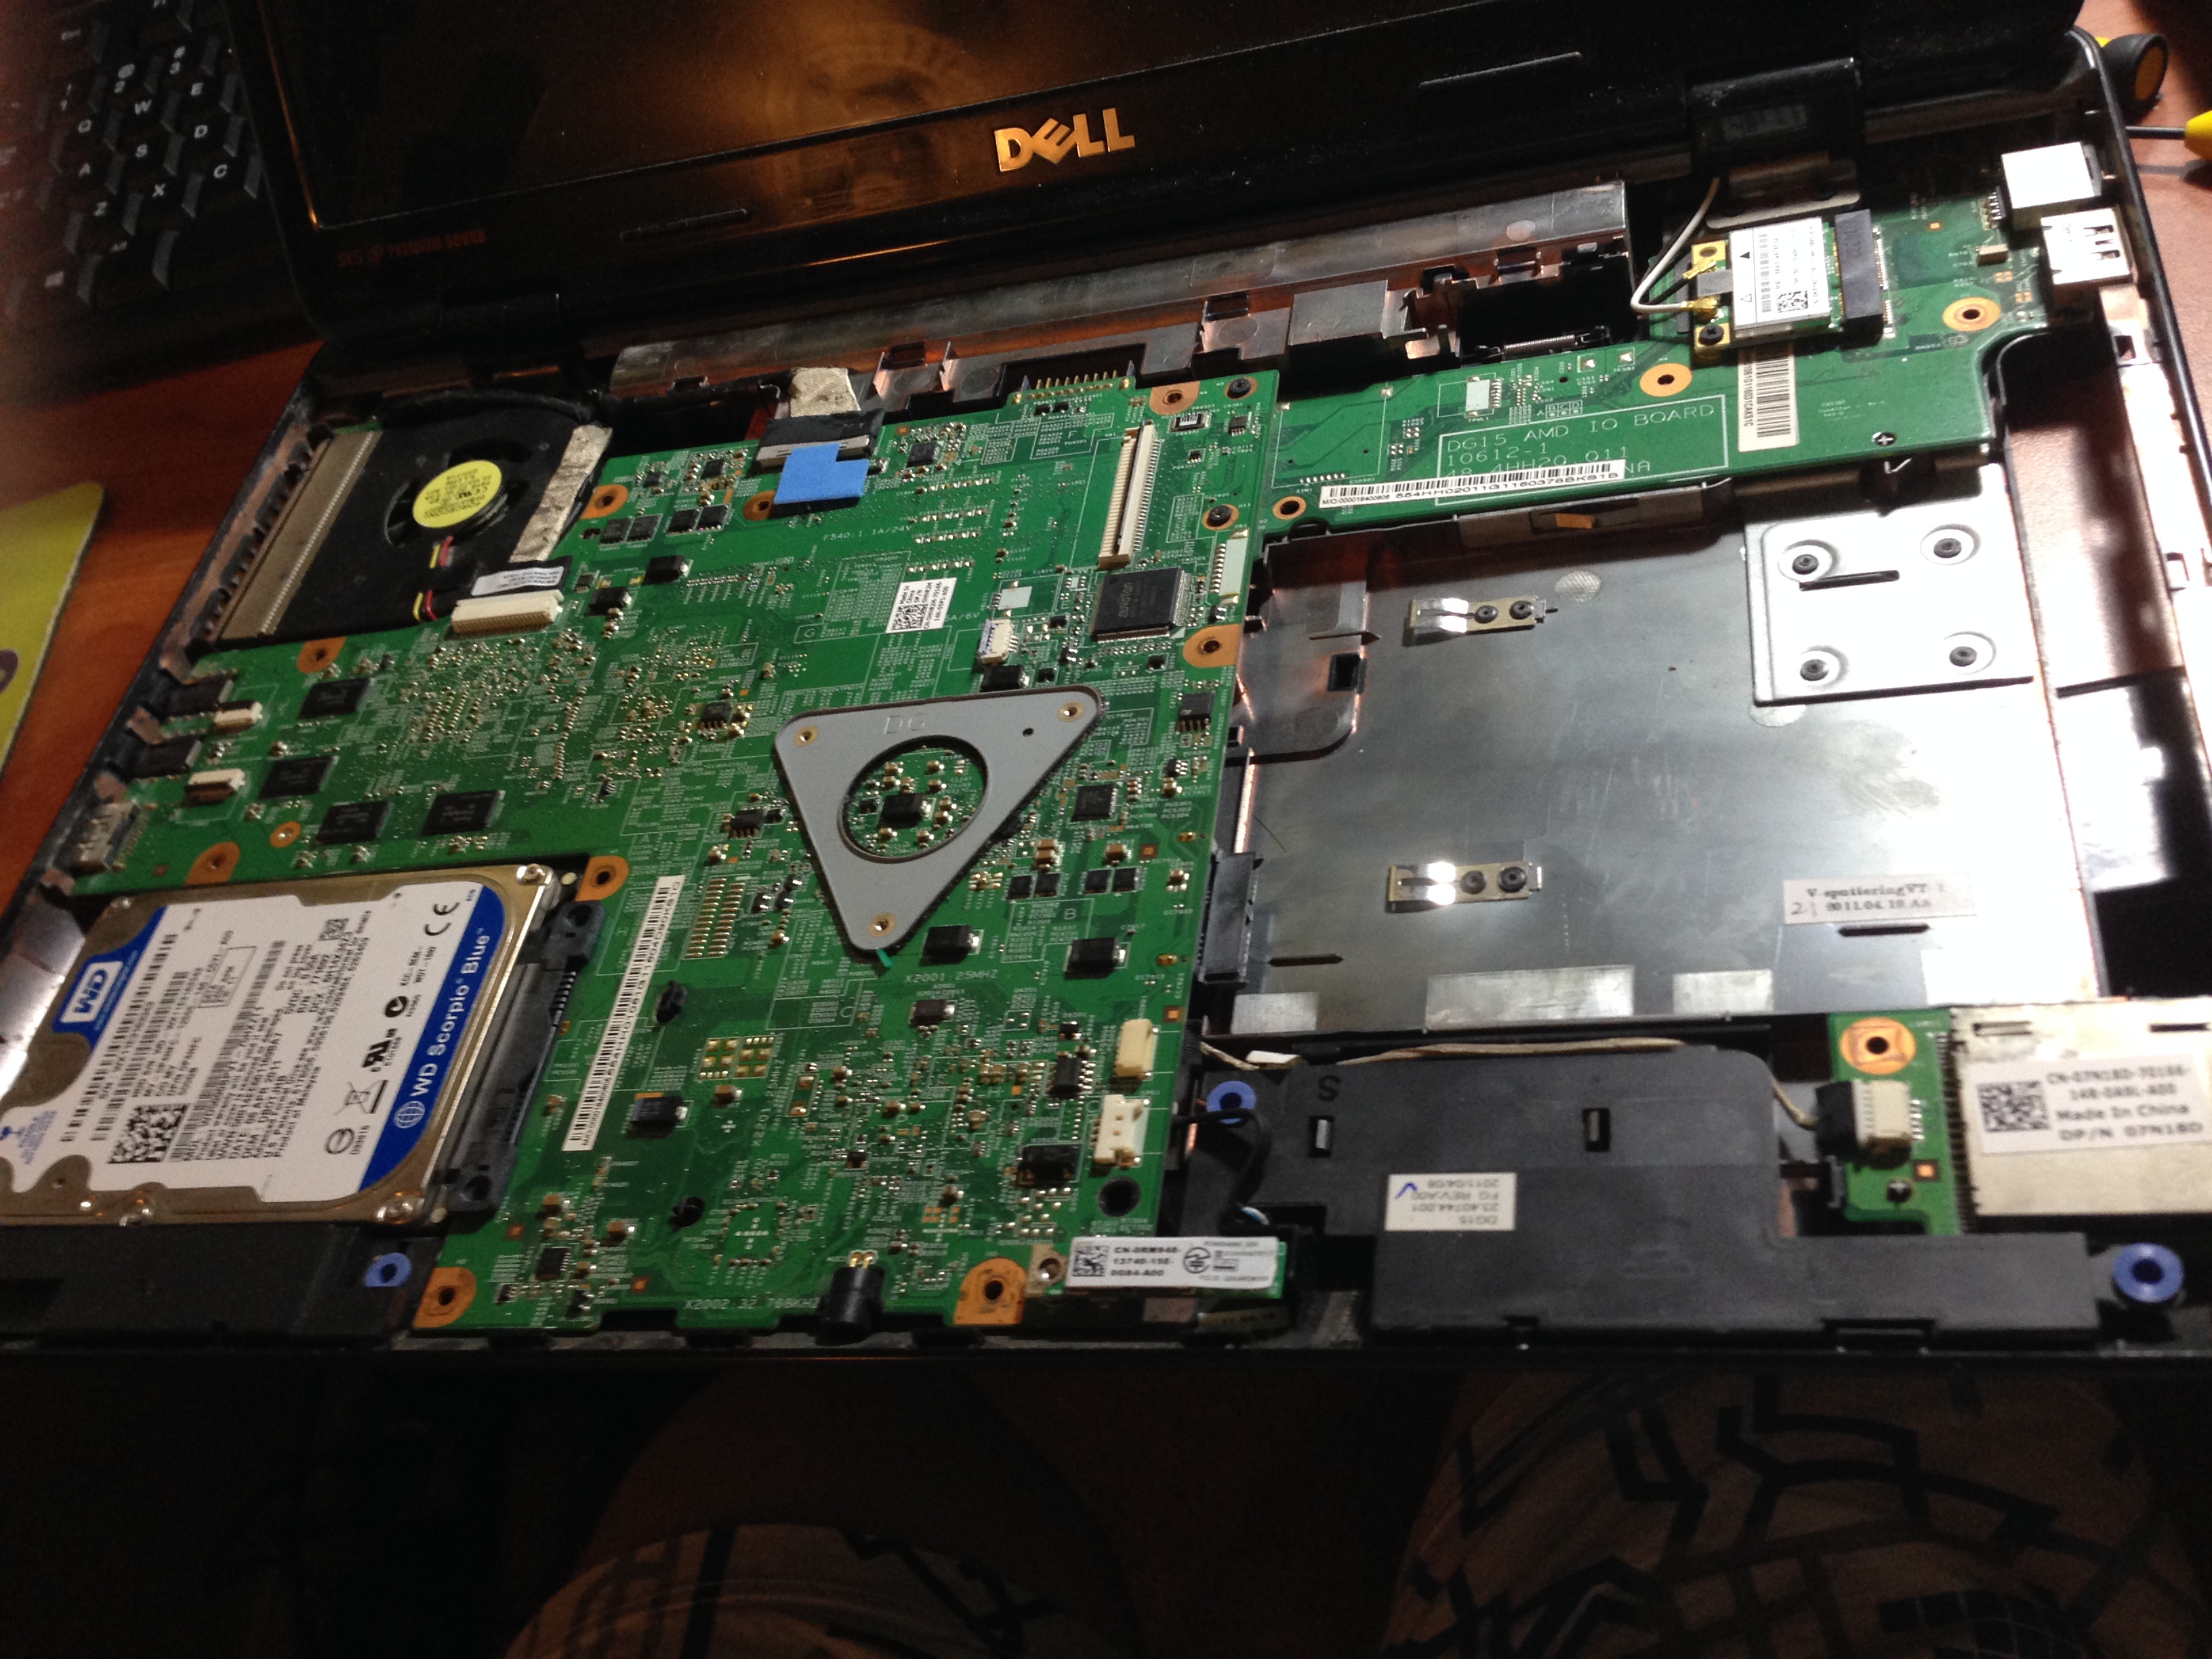
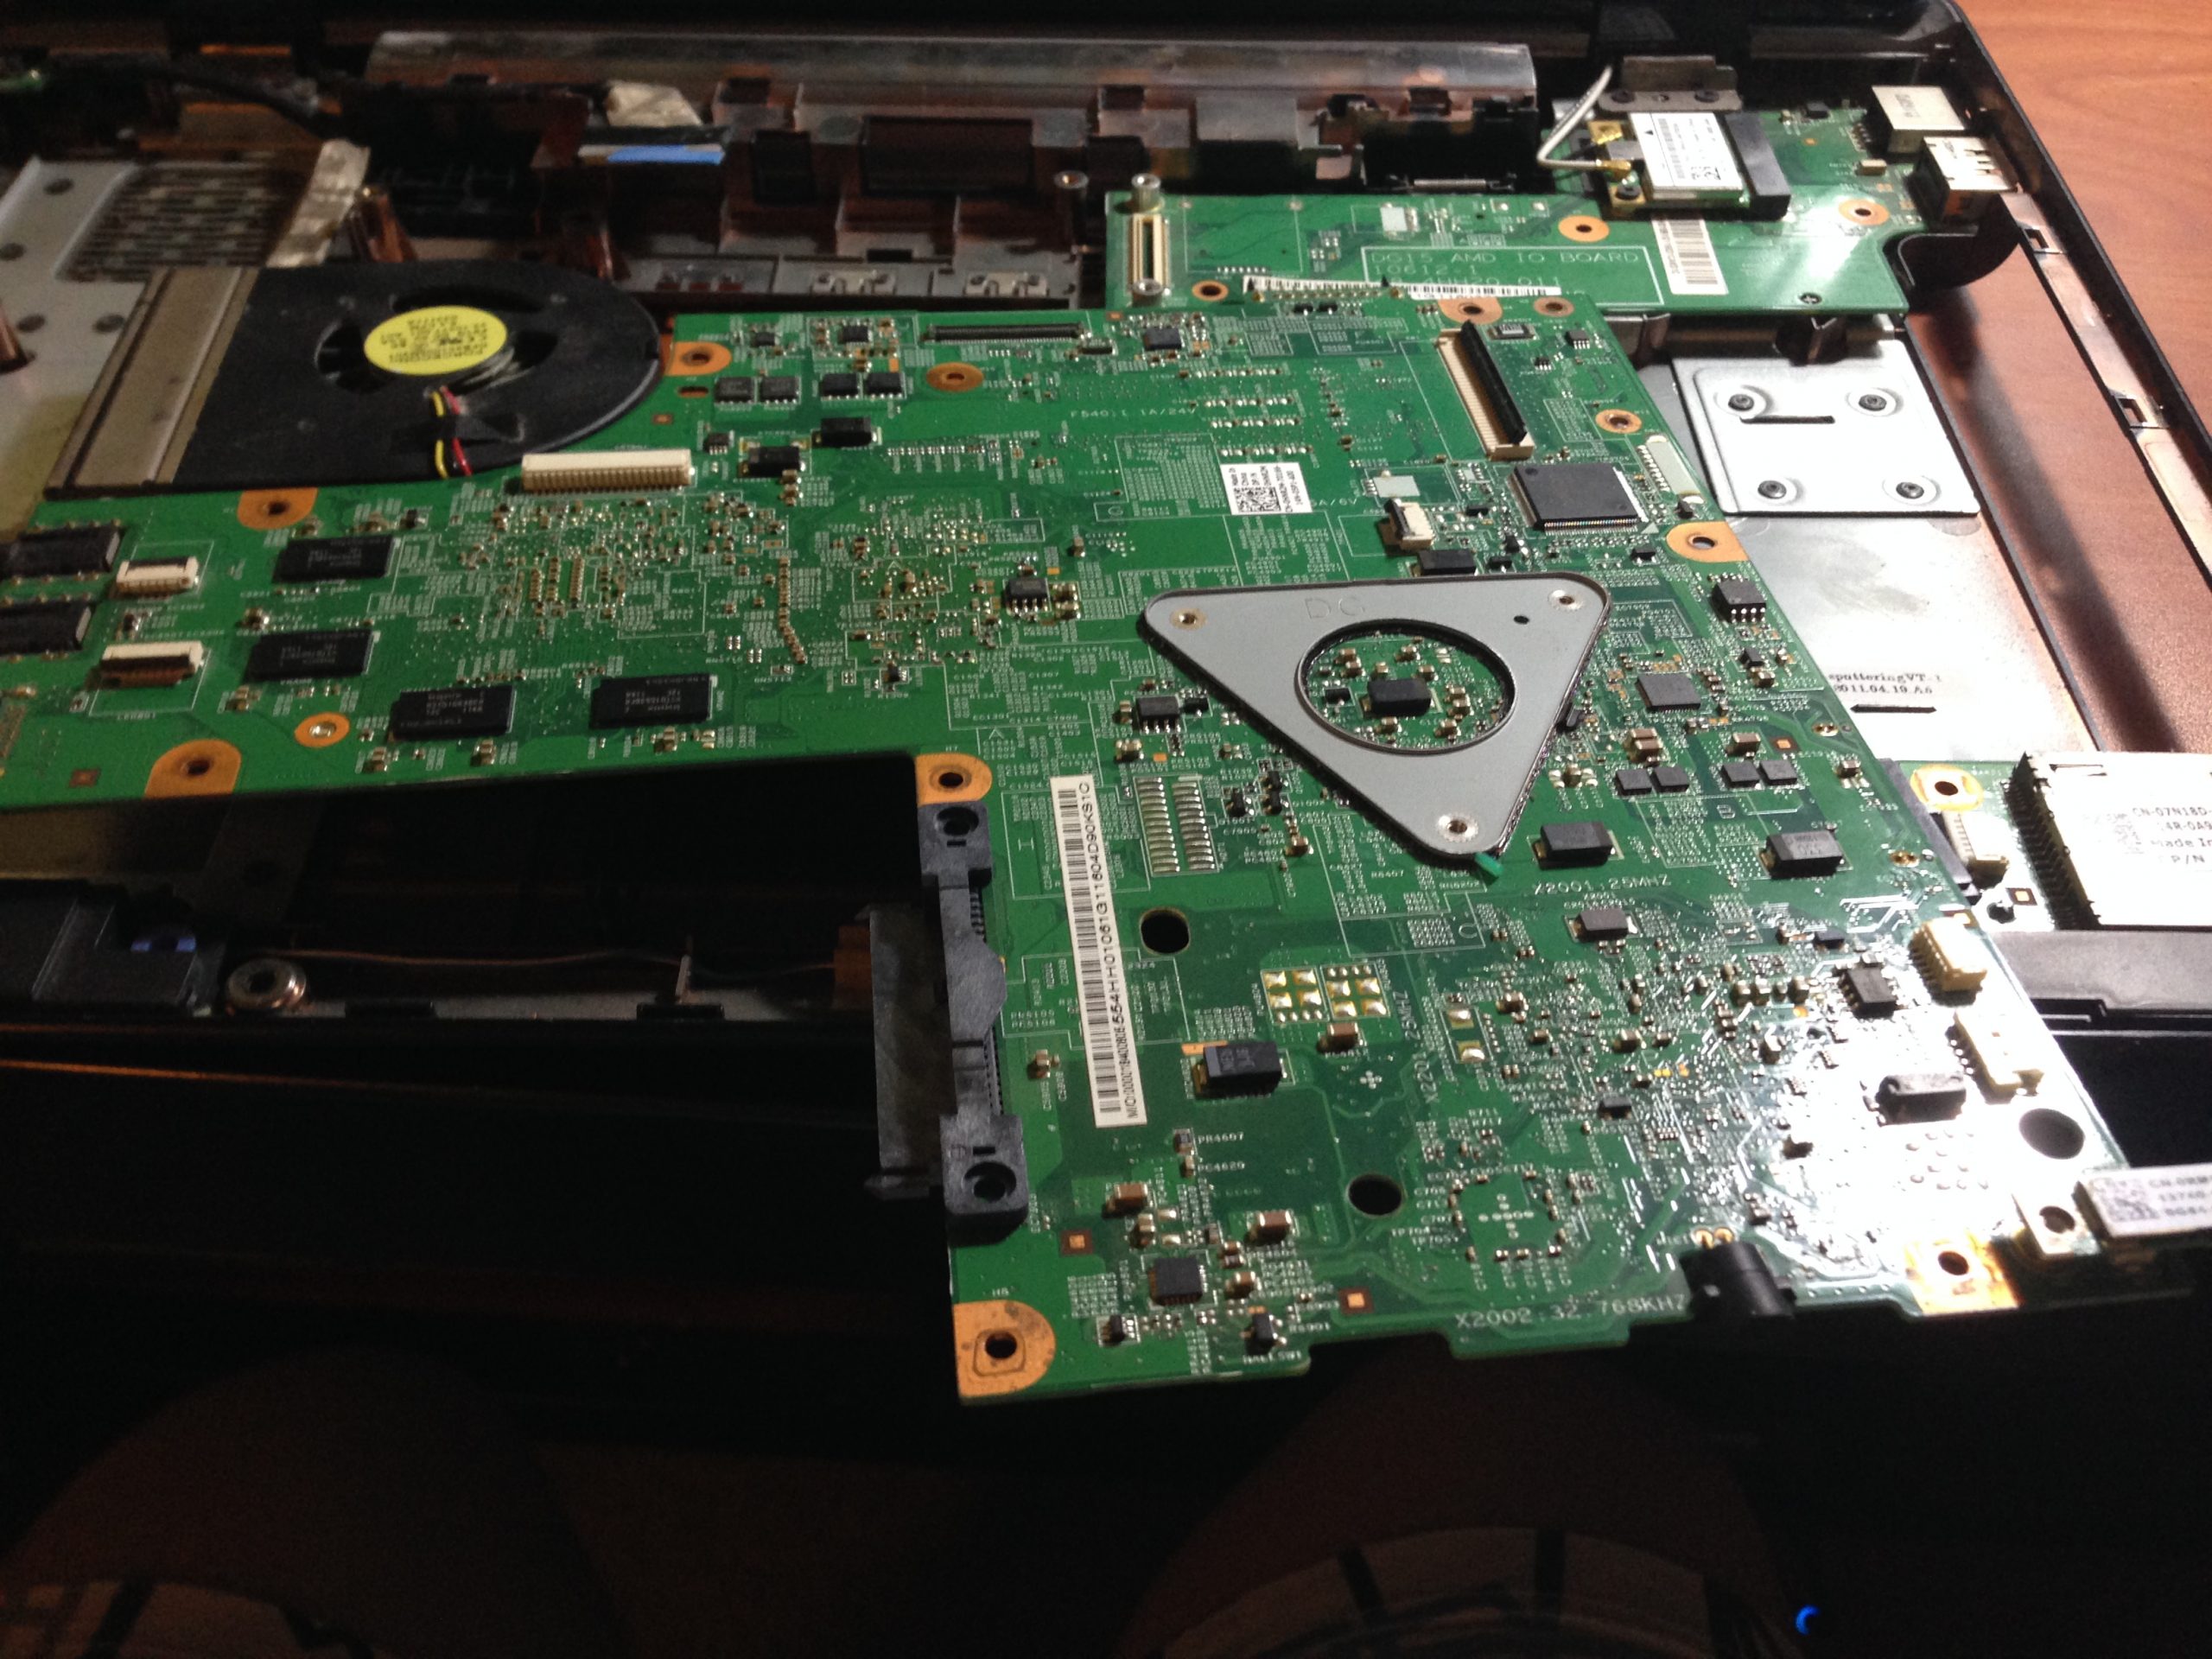
Flick back again, and you can take out the front panel now. Now you can see the actual motherboard. Gently remove the hard disk, and two screws on the middle-upper area, you can detach the motherboard.
Put the motherboard on the clean surface, and you can see the copper tube which is the main heat dissipation part.
Take out the three screws on the CPU as well as one small screw on the left hand side. Then gently take out the heat sinker. And now you are able to see the exposed components.
Clean the thermal paste with a clean cloth or tissue, it will be perfect if you have alcohol. Don’t push too hard and avoid damaging the component.
The parts we are going to use for this lab includes: several 3M double-sided tape; several copper plate, additional copper tube, thermal glue, and small heat sinker. (I bought all these parts from a website called taobao.com)
The following steps are important:
- Cut a square inside the 3M tape, the size of the square should be a little bit bigger than the component you are going to work on.
- Peel off one side of the tape and put it on the component(you don’t need to put this on CPU because CPU has pretty good connection design with the copper tube heat sinker).
- Evenly put some thermal paste on the surface of the component (You can do a much better job than me in putting thermal paste “evenly”)
- Peel off the other side of the 3M tape, and put the copper plane on the top of the component (clean the copper plate as you can before putting it on).
- Evenly put some thermal paste on the surface of the copper plate.
- Put the original copper tube heat sinker back, and put back the screws.
- Reshape the additional copper tube to make it fitting your board. For this step your creativity comes in! You can bent the copper tube as you want according to your design! It’s pretty easy to bent it with a prier.
- Put the additional copper tube on the heat sinker to make it a second heat dissipation path for some components. For my design, I just put the copper tube side by side with the original one, and connect it with the northbridge and the GPU. Use the thermal glue to attache the additional copper tube.
- To further improve the heat dissipation, you can put the small square heat sinker on any surface you want. For me, I put two of them on the GPU. Also I attached two copper plates on the two copper tubes to make them share heat better.
- After these, you can put everything back and start the laptop to see if the problem is solved.
- To further improve the heat problem, I keep the memory lid off, and the key board off, and add an laptop cooler. In this way, there is a pretty good air flow all the way through the laptop.
- For me, the result is pretty exciting. I got about 138 fps when I run the League of Legends. Previously I only got about 30 or 40 fps, especially during the team fights, which is caused by the overheat problem of the GPU. Now the GPU is cooler, so the fps is more stable when running games.
Reference: The idea of using 3M tape and copper plate comes from tech shop whose name is KaiXiang. I give credit to them and show my respect to their clever idea.
More pictures to be added….
Yingzhang Dong
Austin, TX
2016
This article is originally written by Yingzhang Dong, and please note source if you would like to quote.
cool